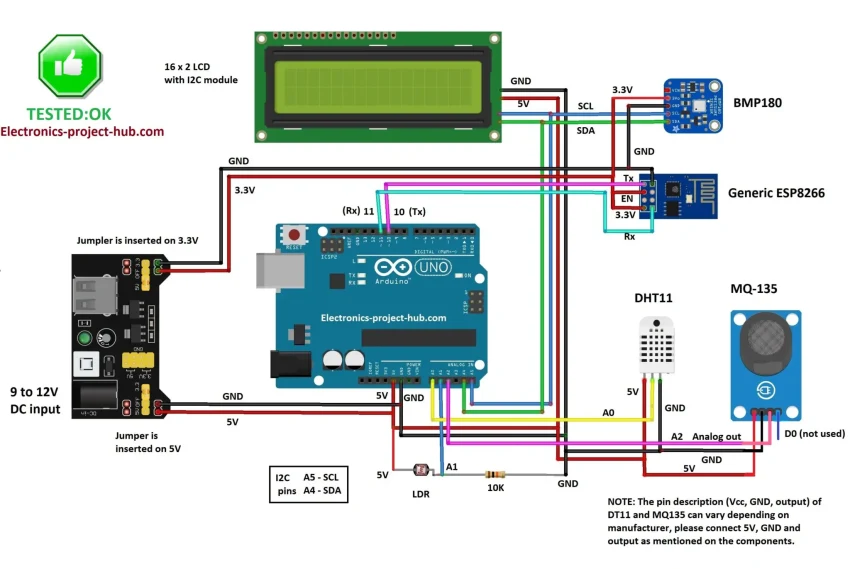
Arduino Based Smart Weather Forecasting System Circuit Diagram Introduction. A Smart Weather Station is an electronic device that collects and displays real-time weather data such as temperature, humidity, pressure, and more. This project utilizes an Arduino board along with various sensors to create a compact, cost-effective, and efficient weather monitoring system.. Components Required. To build this smart weather station, you will need the following A compact weather station that displays real-time temperature, humidity, and wind speed on an OLED screen, with mode selection controlled by a button. Smart Weather Monitor with OLED Screen Feb 3, 2025 𝐃𝐞𝐬𝐜𝐫𝐢𝐩𝐭𝐢𝐨𝐧: "Transform your space into a weather-savvy hub with our comprehensive tutorial on building a weather monitoring system using Arduino
Weather monitoring is essential for various applications, from agriculture to home automation. The Arduino-based Weather Station using the BME680 sensor allows users to measure temperature, humidity, pressure, and gas resistance.The data will be displayed on an I2C LCD screen in cyclical manner, also it calculates Dew Point using Magnus formula and Altitude from pressure.
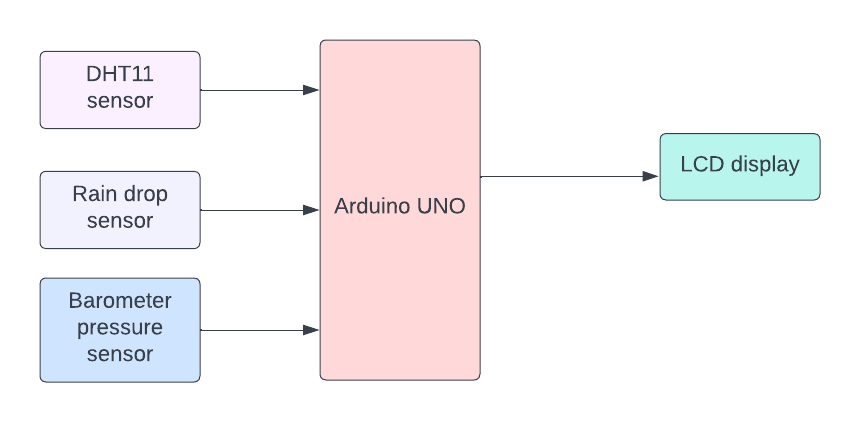
Arduino Wireless Weather Station : 9 Steps (with Pictures ... Circuit Diagram
In this video, I'll guide you through creating a Weather Monitoring System using Arduino! This exciting project uses a DHT11 sensor and an OLED display to me In this step-by-step tutorial, we'll show you how to create a Weather Station using DHT11 and I2C LCD Display with Arduino.This beginner-friendly project lets you monitor temperature and humidity in real-time, making it a perfect addition to homes, greenhouses, or any indoor space where climate control matters.

The connection with Arduino is extremelly easy. We connect the sensor pin with the + sign to the 5V or the 3.3V output of the Arduino. We connect the sensor pin with the - sign to GROUND. Lastly we connect the OUT pin to any digital pin of the Arduino. In order to use the DHT22 sensor with Arduino we have to use the DHT library.

Weather Station by Using Arduino UNO R4 WiFi Circuit Diagram
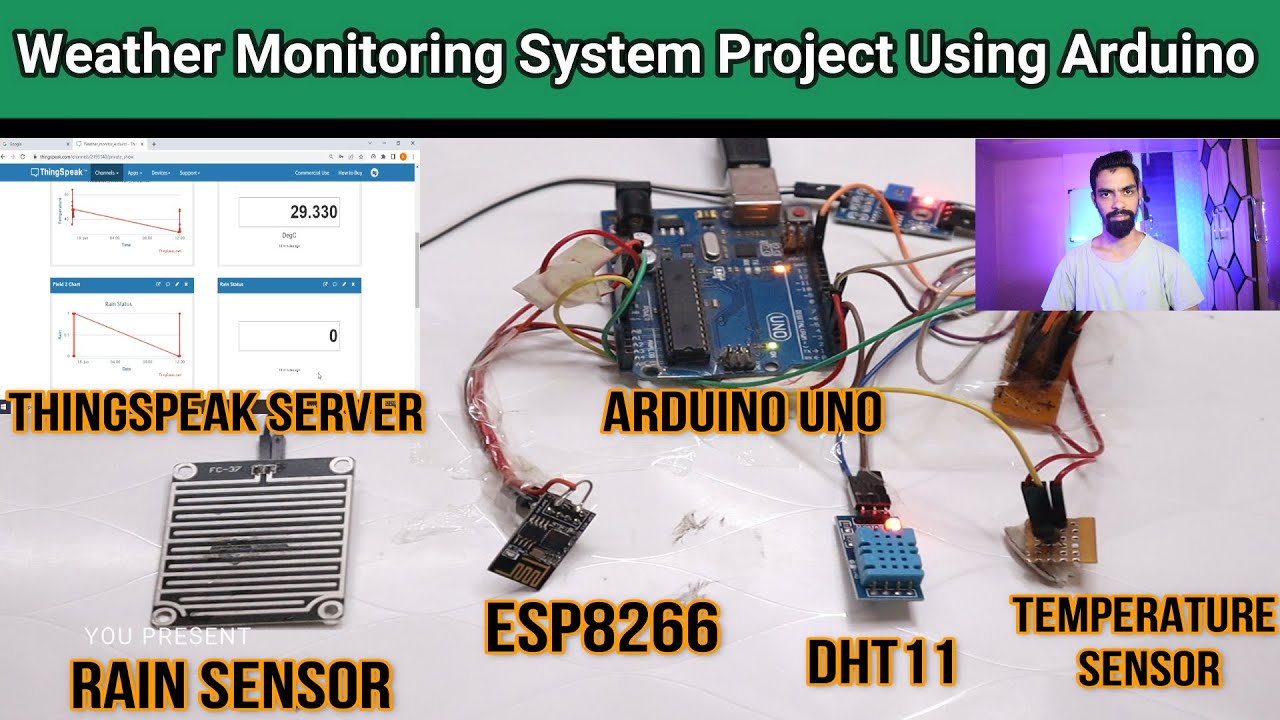
It is a system that involves in acquiring weather and environment data using advanced electronic sensors and sending them to a web server vi. IoT Based Weather Monitoring System Using Arduino.